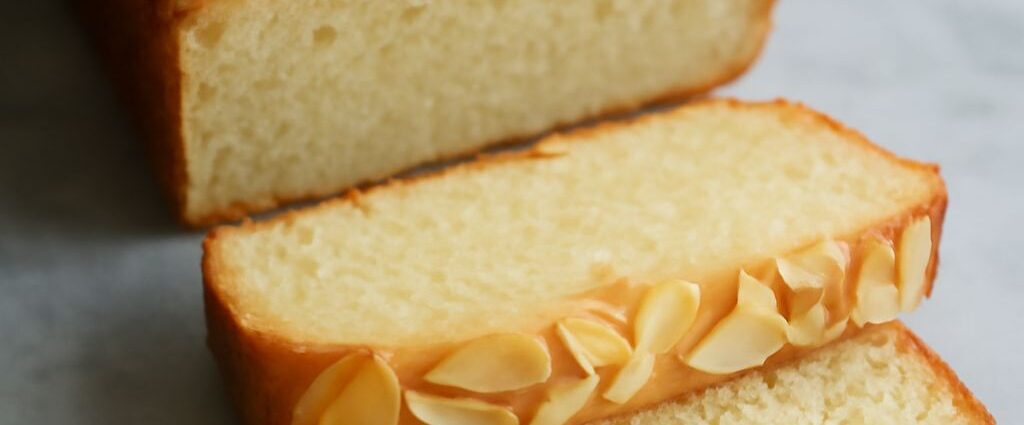
A tender, sliceable loaf without wheat, eggs, or dairy starts with a dough that looks and feels different from ordinary wheat bread. This vegan recipe for gluten-free bread uses rice flour, cornstarch, and psyllium husk to make a small loaf for toast and sandwiches. Expect a sticky dough, a patient rise, and a complete cooling period before slicing.
The oven method below is adapted from Marta in the Jar’s rice sandwich bread. A bread machine can help if its pan and settings suit the dough, but its timing and mixing need attention. The small loaf is a good place to learn what the mixture should look like before making adjustments.
Gluten Free Vegan Bread Recipe: A Small Rice Flour Loaf
This gluten free vegan bread recipe makes one small loaf in a 6-by-4-inch pan. Weigh the ingredients for the most consistent result; flour and starch volumes can vary with the product and the way they settle. Allow 3 to 5 hours for the rise, about 30 minutes for baking, and additional time to cool fully.
Ingredients
- 100 grams white rice flour
- 55 grams cornstarch
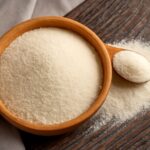
- 6 grams whole psyllium husk, not psyllium powder
- 3 grams dry yeast, about 1 teaspoon
- 2 grams fine salt, about 1/2 teaspoon
- 200 grams lukewarm water, about 3/4 cup plus 1 tablespoon
- A little neutral oil for the pan
- Sesame or poppy seeds for the top, optional
Choose ingredients labeled gluten-free when avoiding gluten is essential, and check that the yeast and any toppings meet your dietary needs. The ingredient list contains no eggs, milk, or butter. A gluten free dairy free bread recipe still requires clean equipment if gluten or dairy cross-contact is a concern.
Method
- Lightly oil a 6-by-4-inch loaf pan. Set aside a few tablespoons of the measured lukewarm water and stir the dry yeast into it. Keep the remaining water nearby; both portions belong in the dough.
- In a bowl, whisk the rice flour, cornstarch, whole psyllium husk, and salt until evenly combined. Add the remaining water and stir thoroughly, then add the yeast and its water. Mix with a sturdy spoon or a stand mixer’s paddle until no dry pockets remain.
- Gather the sticky dough into a short log with damp hands and place it in the pan. Smooth the top gently. Cover loosely and let rise in a warm place for about 3 to 5 hours, until visibly puffed. The time depends on the room and the yeast; use the dough’s appearance as well as the clock.
- Heat the oven to 430°F. If using seeds, sprinkle them over the top and moisten lightly so they adhere. Bake for about 30 minutes, until the top is golden and the loaf is set. If the crust darkens before the center is ready, tent it loosely with foil and continue baking.
- Turn the loaf out onto a rack and let it cool completely before slicing. The crumb continues to set as it cools, so cutting into a hot loaf can make it seem wet and gummy.
This vegan gluten free bread recipe makes a small loaf, not a tall supermarket sandwich brick. A small pan supports the dough as it rises. In a much wider pan, the same amount will spread into a shorter loaf and may bake differently.
Why these ingredients work together
Rice flour supplies much of the loaf’s body, while cornstarch helps lighten the texture. Psyllium husk absorbs water and forms a gel that helps bind the dough and hold some of the gas produced by yeast. It gives structure in a mixture that has no wheat gluten and no egg. The water is not an accidental extra: the husk needs it to hydrate.
Use whole psyllium husk for this formulation. Finely ground powder can absorb water differently and should not be exchanged spoon for spoon. Likewise, a commercial gluten-free blend may contain gums, starches, or different flours in proportions that change the dough. If you use a different blend or binder, follow a recipe developed for that product rather than assuming the same amount of water will work.
Mix until the ingredients are evenly hydrated, scraping the bowl as needed. The dough should be sticky and cohesive, not a dry, flour-dusted ball. Damp hands or a damp spatula make it easier to shape. Resist the urge to add handfuls of extra rice flour just because the dough clings to your fingers; the resulting loaf can become heavy and dry.
Dry yeast produces gas during the rise. If yours has been open for a long time or stored poorly, check its activity using the package directions before starting. Cool conditions can lengthen the rise; choose a warm, draft-free spot.
Judge the rise and the bake
Cover the pan loosely so the surface does not dry out, and give the loaf time to become visibly larger and airy. With a small dough and a small pan, the change is easier to judge if you note the starting height. The dough does not need repeated kneading or a vigorous punch-down like many wheat breads.
Start preheating while the loaf is nearing the end of its rise. An accurately heated oven gives it a prompt start, helping the structure set around the gas already in the dough. A pale, unset loaf after the suggested baking time needs more time; ovens and pans vary. An instant-read thermometer can help check the center: aim for roughly 205–210°F, then confirm that the crust is set.
Transfer the bread to a cooling rack so steam can escape from the bottom. Let it reach room temperature all the way through before cutting. This wait is particularly important in a gluten-free loaf: the hot interior is still settling.
Using a compatible bread machine
A gluten free vegan bread machine recipe must match the machine’s pan capacity and cycle. This loaf’s source was developed for the oven, and its author reports not having tested it in a machine. Treat the following as an adaptation, not a promise that every appliance will bake this small quantity well.
Check the manual for a gluten-free or programmable cycle with one thorough mix, one uninterrupted rise, and a bake. Confirm that the paddle can reach and mix a small batch and that the machine accepts the batch size. A pan designed for a much larger loaf can spread this dough too thinly; an automatic program may also move to baking before the 3-to-5-hour rise described above is complete. In either case, use the oven method or a recipe developed for that machine.
If your machine can accommodate the batch, add ingredients in the order specified by its manufacturer. During mixing, use a clean flexible spatula to scrape dry flour from the corners when the manual permits opening the lid; keep it clear of the moving paddle. The mixture should be evenly wet and sticky, with no dry flour trapped underneath. Smooth the top gently before the rise if the machine allows it.
For a vegan gluten free bread machine recipe, also compare the cycle’s rise and bake times with the cues above. If the machine has a programmable rise or a separate bake setting, let the dough puff before baking according to its manual. If the cycle cannot accommodate the rise, do not count on a standard wheat-bread program to make up the difference. Remove the loaf promptly after baking and cool it completely on a rack.
Serving, storing, and choosing equipment
Once cool, use a serrated knife and gentle sawing strokes to cut slices. Toast brings back some crispness at the edges and makes a sturdy base for hummus, smashed avocado, or a spoonful of warm beans. The small slices also work well beside soup.
Store the completely cooled bread in a closed container at room temperature for short-term use. For longer storage, slice and freeze it in a well-sealed freezer bag, separating slices with parchment if you like. Toast individual slices from frozen. Cooling before packing helps avoid trapping excess condensation against the crust.
For a loaf without gluten and animal ingredients, equipment cleanliness matters as much as the shopping list when cross-contact must be avoided. Wash the pan, bowl, paddle, counter, and utensils thoroughly before beginning. Use a clean toaster when needed.
Fix a dense or gummy result
A dense loaf has a tight, heavy crumb with few visible air pockets. If the dough barely rose, check the yeast and give the next batch more time in a comfortably warm spot. Measure the water and psyllium by weight, and avoid adding extra flour during shaping. If the dough rose well but spread low, check that the pan was the small size specified.
A gummy loaf has a sticky, compressed interior, especially around the center. First let it cool completely; if the center is still wet, it may have needed more baking. Next time check the oven temperature, allow more time if needed, and verify the loaf’s internal temperature before removing it. Keep the specified binder and flour formulation so changes in hydration do not hide the cause.







Comments are closed, but trackbacks and pingbacks are open.